How to Install Cabinet Knobs: A Step-by-Step Guide for Perfect Placement
Are you looking to add a touch of elegance and functionality to your kitchen or furniture? Wondering how to install cabinet knobs effectively? Whether you’re revamping your kitchen or giving your cabinets a makeover, knowing the ins and outs of installing cabinet knobs can make a significant difference in the overall aesthetics and functionality of your space. In this guide, we’ll explore everything you need to know about installing cabinet knobs, from different types of knobs to the best placement techniques.
Different Types of Knobs for Cabinet Doors
When it comes to selecting cabinet knobs for your doors, you’ll find a wide array of options available to suit various styles and preferences. Let’s explore some of the different types of knobs commonly used for cabinet doors:
Classic Round Knobs
- Classic round knobs are timeless and versatile, making them a popular choice for many kitchen and furniture designs.
- They come in various materials, including metal, wood, ceramic, and glass, allowing you to choose the perfect finish to complement your decor.
- Round knobs offer a comfortable grip and a simple, understated look that blends seamlessly with traditional, transitional, and contemporary styles.
Elegant Square Knobs
- Square knobs add a touch of modern sophistication to cabinet doors, making them ideal for contemporary and minimalist spaces.
- They feature clean lines and geometric shapes, creating a sleek and polished appearance.
- Square knobs are available in a range of materials, such as stainless steel, brushed nickel, and matte black, offering endless possibilities for customization.
Stylish Bar Pulls
- Bar pulls, also known as handle pulls or cabinet handles, are elongated knobs that provide a sleek and streamlined look to cabinet doors.
- They offer a comfortable grip and easy operation, making them suitable for high-traffic areas like kitchens and bathrooms.
- Bar pulls come in various lengths and finishes, allowing you to achieve a customized look that complements your cabinetry and overall design scheme.
Decorative Novelty Knobs
- Novelty knobs add personality and charm to cabinet doors, making them perfect for children’s rooms, themed spaces, or eclectic designs.
- They come in a wide range of shapes and designs, including animals, flowers, fruits, and geometric patterns, allowing you to express your creativity and individuality.
- Novelty knobs can serve as focal points or accent pieces, injecting personality and whimsy into your cabinetry and decor.
Vintage-Style Bin Pulls
- Bin pulls, also known as cup pulls or drawer pulls, are reminiscent of vintage hardware commonly found in farmhouse, rustic, and shabby chic designs.
- They feature a cup-shaped design with an open top, making them ideal for easy access to drawers and cabinets.
- Bin pulls are available in various finishes, such as antique brass, oil-rubbed bronze, and distressed iron, adding a rustic and charming touch to your cabinetry.
Regardless of the type of knob you choose, consider factors such as durability, functionality, and aesthetic appeal to ensure that your cabinet doors not only look great but also perform well for years to come. With so many options available, you’re sure to find the perfect knobs to enhance the beauty and functionality of your cabinets.
Best Placement for Cabinet Knobs
Proper placement of cabinet knobs is crucial for both aesthetics and functionality. The placement will vary depending on the type of cabinet doors and drawers you have. Here’s a guide to help you achieve the best placement for different types of doors and drawers:
For Panelled Doors And Drawers
When installing knobs on panelled doors and drawers, the key to achieving optimal placement lies in finding a balance between functionality and aesthetics. For raised-panel doors, consider positioning the knob near the top or bottom of the panel, ensuring it aligns with the center of the panel’s width. This placement not only creates a visually pleasing symmetry but also facilitates easy access when opening and closing the doors or drawers.
Additionally, placing the knob slightly away from the edge of the panel prevents interference with the frame and allows for a comfortable grip. For recessed-panel doors, aim to position the knob towards the center of the panel, maintaining consistency with the overall design while ensuring practical functionality.
For Slab Doors And Drawers
Slab doors and drawers offer a sleek and modern look that requires a different approach to knob placement. When installing knobs on slab-style cabinetry, focus on maintaining a clean and streamlined appearance. Position the knob towards the top edge of the door or drawer, ensuring it is centered along the width for a balanced look.
Whether opting for horizontal placement on drawers or vertical placement on doors, the goal is to create a visually appealing symmetry that complements the simplicity of the slab design. By positioning the knob towards the edge of the slab, you ensure convenient access while preserving the minimalist aesthetic of the cabinetry. Overall, the best placement for knobs on slab doors and drawers emphasizes both functionality and style, enhancing the overall look and feel of your space.
Tools Needed to Fit Cabinet Knobs
To fit cabinet knobs properly, you’ll need a few essential tools and materials to ensure a smooth and successful installation process. Here’s a list of the tools you’ll need:
By gathering these essential tools and materials before beginning the installation process, you’ll be well-equipped to fit cabinet knobs with ease and precision. Remember to follow the manufacturer’s instructions and take necessary safety precautions while using power tools to ensure a successful and professional-looking result.
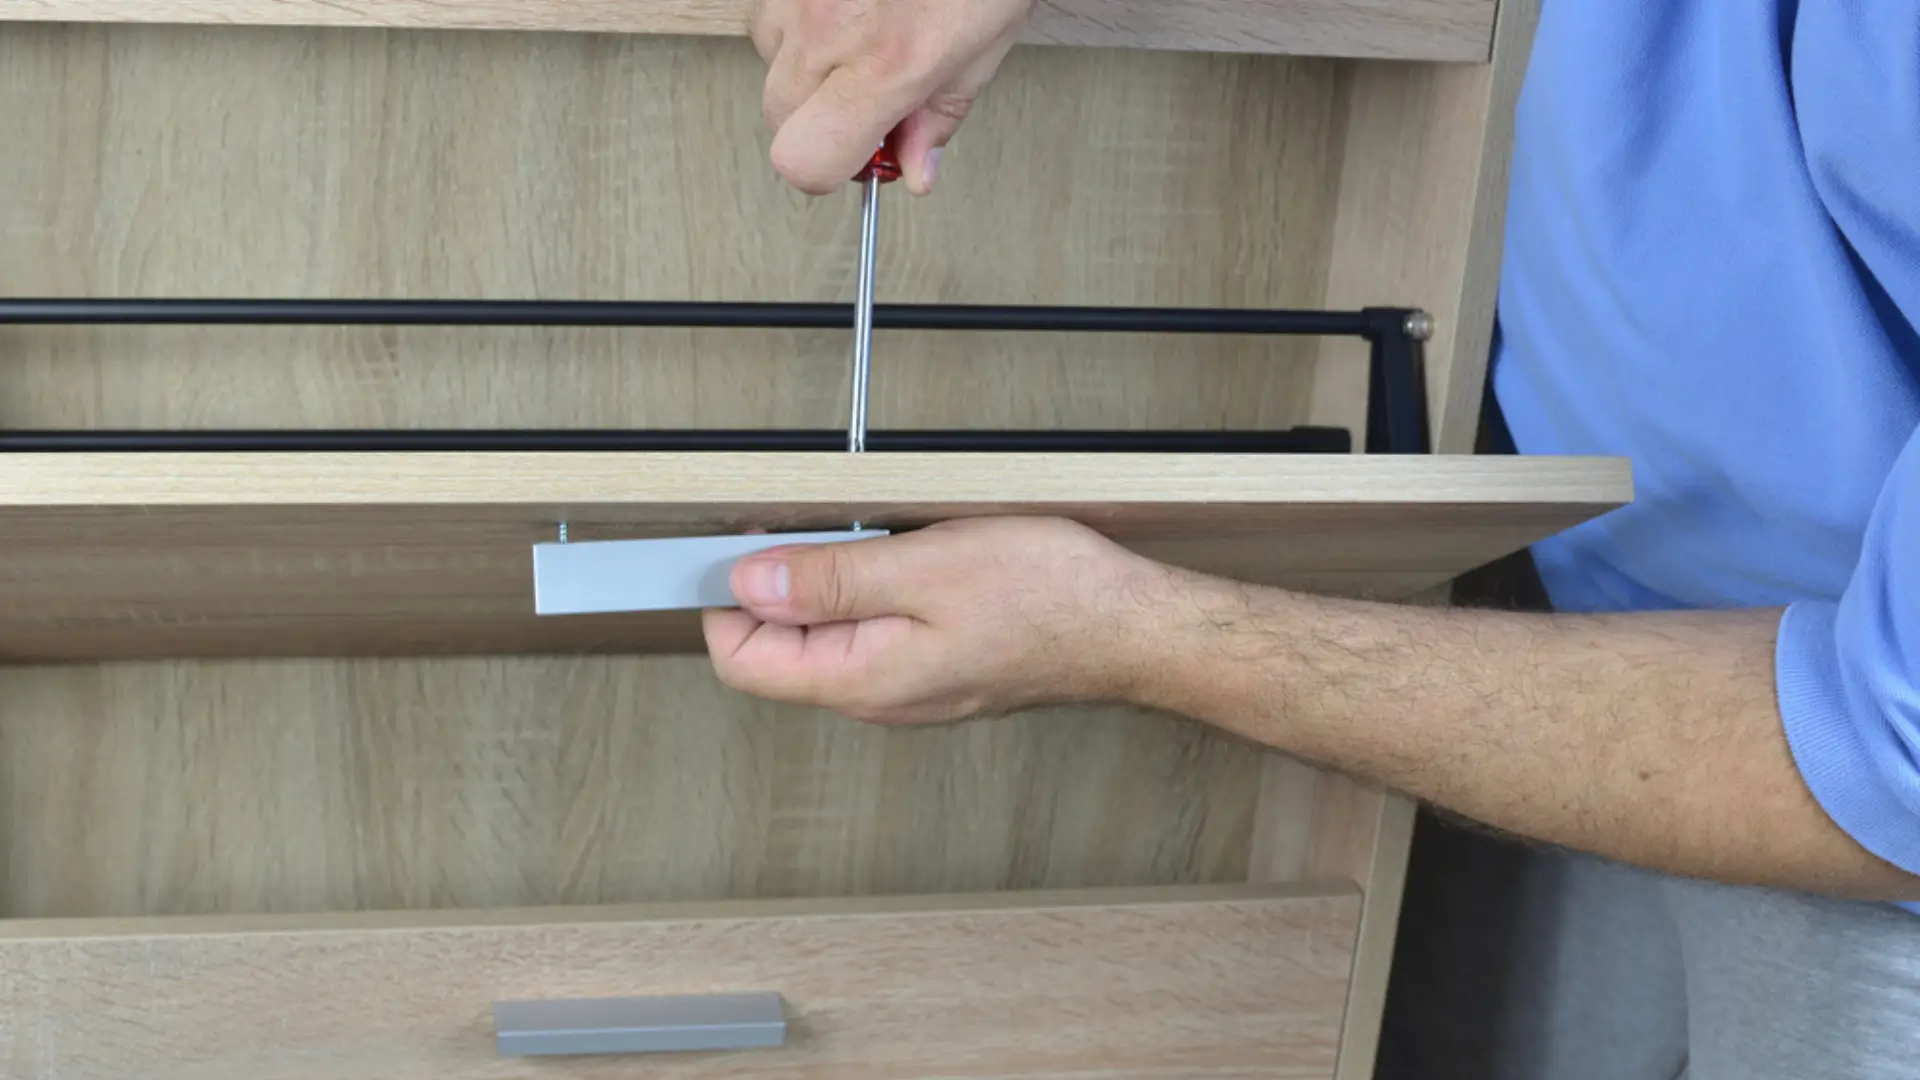
How to Install Cabinet Knobs: Step-by-Step Installation
Installing cabinet knobs is a straightforward process that can elevate the appearance and functionality of your cabinets. Here’s a step-by-step guide to help you through the installation process:
By following these simple steps and taking your time to ensure accuracy, you can successfully install cabinet knobs that enhance the appearance and functionality of your cabinets. Whether you’re updating your kitchen or giving your furniture a makeover, installing knobs is a quick and easy way to make a big impact on your space.
FAQs
Conclusion
Installing cabinet knobs is a simple yet effective way to enhance the appearance and functionality of your kitchen or furniture. By following the steps outlined in this guide and paying attention to proper placement techniques, you can achieve professional-looking results that will elevate the overall aesthetic of your space.
Whether you prefer classic round knobs or contemporary bar pulls, the key is to choose styles that complement your decor and make a statement. With the right tools and a little know-how, you can transform your cabinets into stylish and functional focal points that reflect your personal style.
![What to Consider When Remodeling a Kitchen: Essential Guide [2024]](https://homifyco.com/wp-content/uploads/2024/02/What-to-Consider-When-Remodeling-a-Kitchen-768x432.webp)